
Our advice for getting started in sewing

That's it, you have decided to learn to sew or you are thinking about it very seriously. We will not try to dissuade you, quite the contrary, sewing is for us a passion that we love to transmit through our sewing kits and through this blog.
In this article we will give you valuable advice to help you get started with peace of mind . There is no absolute truth, but we have been able to learn a lot from our very different backgrounds (Margot learned to sew at a fashion school and I started out as an autodidact).
The first thing you need to know is that sewing takes time and that everything will not be perfect the first time. However, your margin of progress and the satisfaction you will feel will be such that you will not regret having started, we promise you .

Essential equipment:
Let's start with the most important thing, the sewing machine . For a first purchase you will find good entry-level machines between around €150 and €250 (Brother and Singer for example offer good machines in this price range). At this price you will not have any superfluous features and the motor will be a little light to sew difficult fabrics (thick denim, silk or fine jersey), but you will be able to carry out the vast majority of your projects without difficulty.
At first you can do without a serger if it doesn't fit into your budget (this is a machine that sews and cuts the edges of the fabric simultaneously to give perfect finishes. It is also recommended for sewing jersey.) I bought my serger (an Elna 664 pro) after a year and a half, to obtain more professional finishes, but I am always delighted to wear my first creations made 100% with my Singer Simple.
It is also essential for a seamstress to always have an iron (or even better a steam generator) at hand. It will allow you to eliminate creases and regularly iron the seams of your current project for a top-notch result.
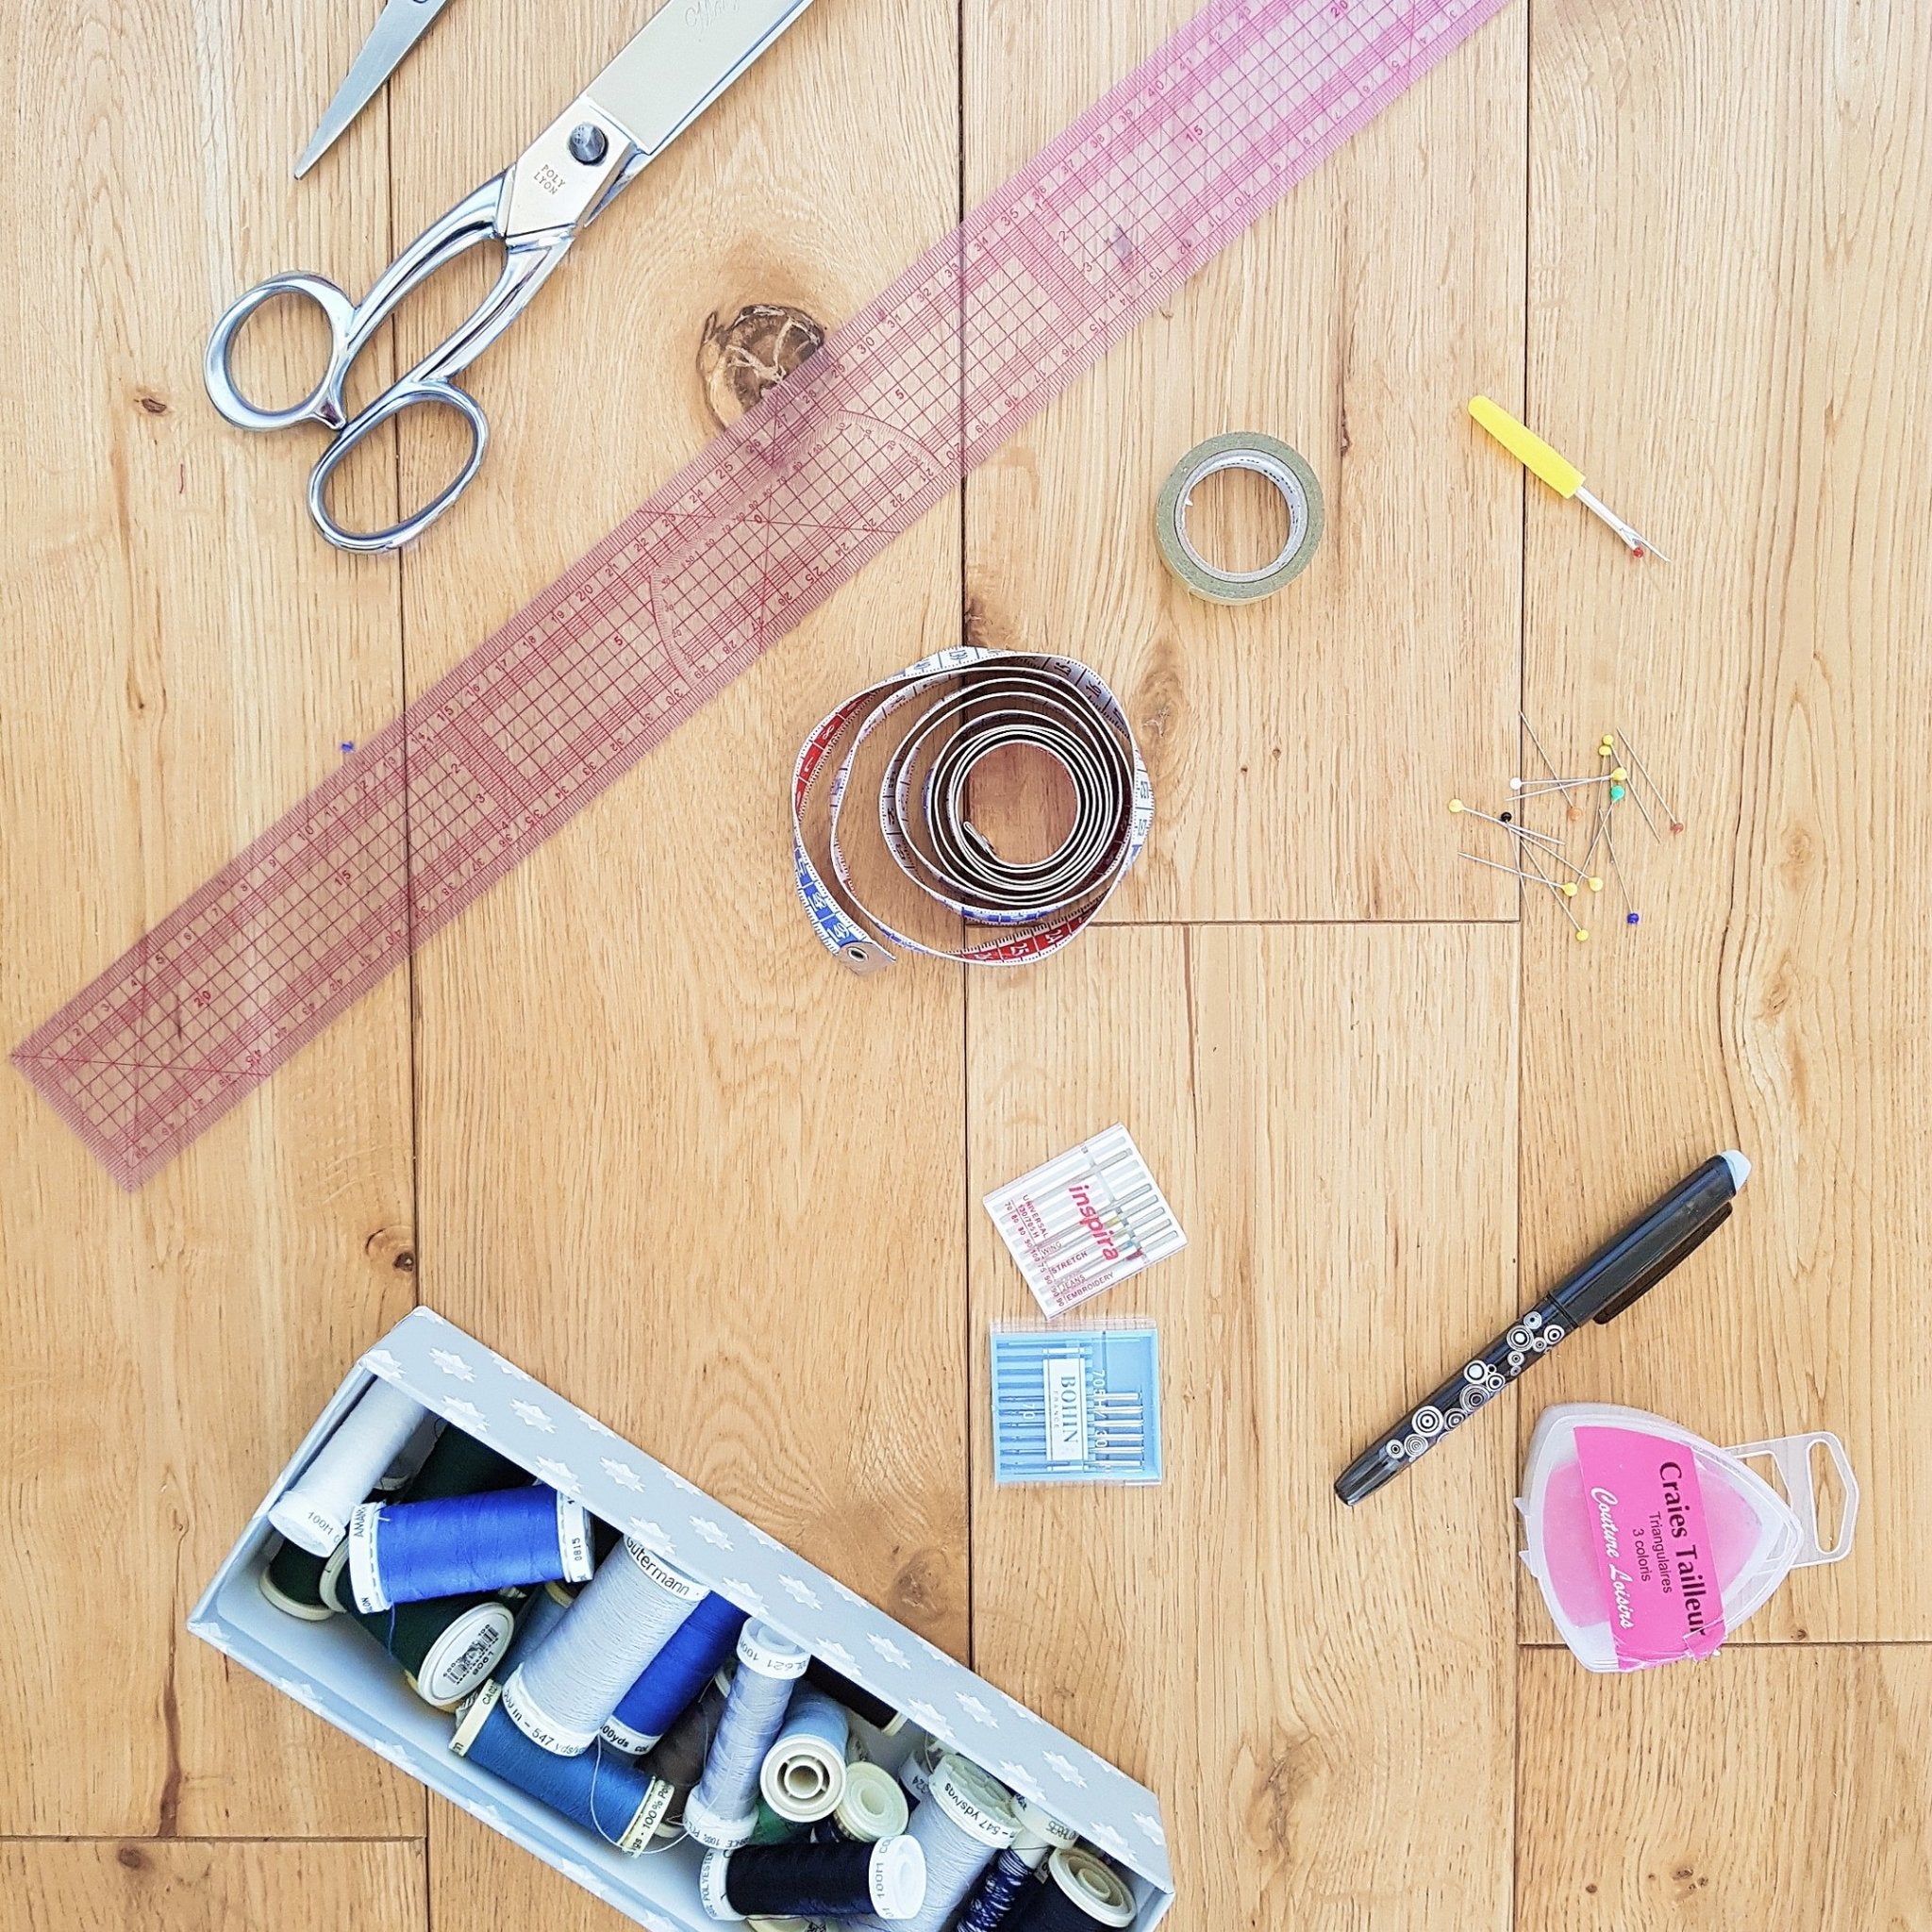
Finally, you will need a lot of "small equipment" . We advise you to buy quality and to favor haberdasheries over supermarkets, so as not to end up with a thread that breaks and scissors that catch.
The essentials:
- A tape measure to take your measurements and choose the size to cut.
- A Japanese ruler (transparent graduated ruler of approximately 50cm x 5cm).
- Tissue paper for tracing the patterns.
- Tailor's chalks in different colours and/or a frixion pen (heat erasable). They will allow you to mark reference points directly on the fabric without leaving permanent marks.
- Scotch tape if you opt for PDF patterns or if you ever want to modify a piece.
- Sewing machine needles . To get started, we recommend that you purchase at least a set of standard needles (ideal for most warp and weft fabrics) and a set of special jersey needles. Here is an idea of the needle sizes generally recommended for different fabrics:
- 60: very fine fabrics (muslin, organza, etc.)
- 70: fine fabrics (silk, fine linings, etc.)
- 80: medium fabrics (cotton, light wools, viscose, polyester crepe, etc.)
- 90: heavy fabrics (twill, velvet, wools, etc.)
- 100: very heavy fabrics (upholstery fabrics, denims, gabardine, etc.)
- 110/120: Very heavy and dense fabrics (leather, very thick canvas)
- Thread . We recommend that you choose 100% polyester, which is more resistant, and have the most common colors in stock. You can then buy spools that perfectly match your new fabrics as you go.
- Needles for hand sewing . They will be essential for certain finishing touches and for attaching buttons.
- Pins.
- Two pairs of scissors : one pair for paper, one pair for fabric. This is essential because paper wears out the blades faster. If you use the same pair for everything, it can quickly snag your pretty fabrics.
- A seam ripper or quick seam ripper, a little magic tool that lives up to its name. And yes, at the beginning you will often have to unpick to start again better and without a quick seam ripper it can take a looooong time.
- A few safety pins to easily slide an elastic into a drawstring.

The material is not essential but still very practical:
- A thread-cutting shear for cutting threads flush with the fabric
- A parrot (curved ruler for drawing curves)
- Tweezers (to be used instead of needles on very thick fabrics for example)
- A rotary cutter , more precise and faster than a pair of scissors, but requiring investment in a cutting mat
- A magnet to pick up all the pins that have fallen onto the living room carpet in just a few seconds
So now you know how to equip yourself, but where to start? Here too we can give you some ideas…
Your beginnings in sewing:
- Start by getting to know your sewing machine . Read the manual (in full) and learn how to operate it. Even with the simplest machines, it is not necessarily intuitive. This step will save you from tearing your hair out later because of a bobbin mounted upside down. Test the different basic stitches of your machine on a scrap of fabric. Practice sewing straight, then rounded, test the stitch lengths...
- Invest in a sewing manual to learn the basic vocabulary and discover how to choose, wash and cut your fabric. To help you, you will also find a small glossary in the introduction to the assembly booklets of all our patterns .
- Get started! Watch tutorials or take classes (online or with a sewing teacher). Taking a few hours of classes with a teacher is a bit expensive but we think it's worth it, at least to get you started with a good foundation. Then tutorials and sewing blogs can take over. The Internet is a goldmine and many seamstresses share their knowledge.
- Choose and make your first project . Why not an accessory like a pencil case or tote bag, but above all a simple project so as not to be discouraged at first try. You will then be able to start making a garment very quickly. However, make sure that the pattern is adapted to your level. On our store for example , you can filter the level of the sewing kits to be sure to choose a suitable project. Finally, you will find on this blog several free tutorials to easily make pretty accessories.
Your first achievement will surely not be perfect but will already be a source of great pride. And you will see, your margin of progression will be visible from project to project . By sewing a few hours per week, you will have already reached an intermediate level in a few months allowing you to sew more complex projects.

Comments
Adjaoud —
Merci pour ces précieux conseils
Avrai dire j’ai fait une formation en Modélisme mais dommage que je n’ai pas eu l’opportunité de travailler dans des ateliers de confection ou haute couture pour l’expérience et les ficelles du métier.
Je veux bien lancer mon projet mais je ne sais toujours pas comment m’y prendre ou l’exposer a qui
Merci